Tuesday, August 28, 2012

Fun Sized

    My second custom order! This was also my first successful experiment dealing with changing the size or scale of a pattern. It was requested to be half the width so it would essentially be the width of one credit card, instead of the normal size I make which is 8" wide.


    These fabrics were chosen from my decent sized stock pile of fabrics which is a collection of fabrics I bought simply because I think they look pretty. I'm always happy when these fabrics get chosen for a project that actually gets finished because they look so much better made into something rather then sitting around folded up on a shelf :) This wallet was almost difficult to part with because of that, but luckily there are some remnants.


    This wallet is a wee little thing. It's roughly 4" wide by 3 3/4" tall. It serves the same purpose as the zipper card pouch taught here. The divided sections are made to fit all those plastic cards we have these days. In addition to the 5 divided sections, there is a teeny tiny zipper section with literally the smallest zipper ever. I had so much fun making this and would constantly stop and comment on how friggen cute it was. I think I will definitely try to make some more wallets this size. Maybe also try a middle size(6" wide by 4ish" tall). If you haven't seen my regular size version of this wallet you can check some out herehere, or here


    The great thing about this little wallet is that it is small to begin with but can get thick enough to hold quite a bit of stuff.  I'd love to hear what you think of this itty bitty wallet. Also, what do you think the optimal size for a wallet is and why?

Comments/Criticisms welcome :)

Friday, August 24, 2012

Flamingo Love

    I've tried listing things on Etsy countless times over the years without too much success because I wasn't great at keeping up with listings and promoting. When I got the crafting fever earlier this year and started posting things in my Etsy shop again I decided to advertise that I was open to custom orders and collaborations. I've seen some projects that turned out great with different elements from different people, it seemed like a fun idea to me. I never would have guessed I'd get my first custom order before getting my first regular sale.


    The custom requests for the construction of this wallet were pretty straightforward and easy to add. A second zipper pocket in place of one of the regular dividers, and twice as many card slots(6 in the front in addition to the 6 at the back). The only tricky part was finding fabrics that could win the client's heart. At the time I was just about to fly from Florida to Ontario so I checked out my fabric store of choice in both of the cities I was in, but neither one had patterns that stood out. In the end we found some fabrics on Spoonflower, which is a website that prints fabrics from images submitted by it's users. Sea Gifts - Tropical Seas-Seaweed and Flamingo Love were ordered and I grabbed a simple blue print from fabric land as an accent. 


    I was pretty happy with how it all turned out in the end, and the order-er left me very positive feedback after she received it so thankfully she liked too. Let me know what you think. What are some color combos or patterns you think would look good on this style of wallet?

Comments/Criticisms welcome.

Tuesday, August 14, 2012

MLP Cross stitch iPhone Case

** I've entered this in my friend's contest over at Craft Battles. Go check it out and vote for who's project you think is best!**


    I know this blog needs a serious update soon, but I'm just going to make a quick post about my updated phone case instead. 


    Early this year I bought a case off amazon for my iPhone. The Cross Stitch Silicone Case for iPhone 4 is a rubbery phone case with a 43x22 grid on the back for cross stitching. (There is also an alternative Cross Stitch iPhone case kit on amazon that is a harder plastic with a 71x35 grid). I bought the first one because it was cheaper but if I buy a second one in a different color I'll probably give the hard shell a try. 


    The size of the grid is the only thing limiting the customization of my phone case. Finding patterns that are 22 stitches or less in width can be a little challenging. This little rose was the first pattern I used. Now that I think about it, I must have had that design on my case for almost half a year :\ I guess it really was time to redo it, oh well. This time I wanted to do an image that was a little more fun. I chose Spike from My Little Pony because a) he's super cute, and b) I found this picture of a perler bead project someone made which I copied to make my cross stitch chart. He's super tiny, measuring just 17x29 stitches, so he fit on my iPhone case perfectly :)


    I hope all you bronies and pegasisters love it as much as I do. And if anyone knows of anything else that could translate well into a tiny cross stitch pattern then please let me know! Thanks for looking.

Comments/Criticisms welcome.

Wednesday, July 4, 2012

More Pockets!

    Who doesn't love pockets? Pajama pants are better with pockets, dresses are better with pockets, and girl jeans are a pain because of their lack of usable pockets. 

Diablo 3 Lanyard!
    A purse is a thing designed to hold other things, it's basically a giant pocket with a strap. When you run out of space in the pockets built into your clothing, you add a purse to your outfit. The issue with using this "large pocket" for multiple items, however, is keeping things organized. Although my Demi bag had pockets all around the lining of it already, the big area in the middle would constantly be a mess of cords and items too big for the pockets but still small enough to get lost in the chaos. So I made myself a purse organizer.


    I had seen tons of these on Etsy in all shapes and styles and knew that it was just what I needed. Miche actually offers their own purse organizers, but only for the Classic and Prima bags. Making my own wasn't too difficult. The biggest issue I came across was sewing the lining and outside together. Because I used such thick/sturdy interfacing I didn't want to attempt the method where I leave a little hole somewhere and turn it right-side-out after sewing it together inside-out. And I wasn't confident I'd be able to sew around the top edge very well with my sewing machine, because of the corners and interfacing getting in the way. So I ended up sewing it by hand with white thread using the blanket stitch. 


    As a bonus, my Miche bag now can stand up on it's own. Usually Miche shells are very stiff so they hold the bag's shape. However, mine was made out of a thin fabric, and I only used a light-medium weight interfacing on it, so it would slump quite a bit when I set it down. But not anymore :) Thanks for looking!

Comments/Criticisms welcome.

Thursday, June 28, 2012

It's All in The Details

    Pinterest.com is a great website. Especially for crafty people like me who previously had to bookmark or save a picture of every single web page on the Internet that created a spark of inspiration. It's simple to sort into categories and view all your pins easily, plus being able to see what everyone else is pinning is also a great source of new ideas you might not otherwise find.


    One thing that I didn't know was popular on the Internet until I started using pinterest was nail polish and nail art. There are entire pin boards of fingernails decorated in different designs and styles. They are all so lovely and it made me want to try some of them instead of my regular solid color or French manicure. I stole this picture from Google, sadly my own attempts at the swirl patterned nails didn't go so well. With written instructions on blogs and even video demonstrations on YouTube, I'm still not sure where I went wrong.


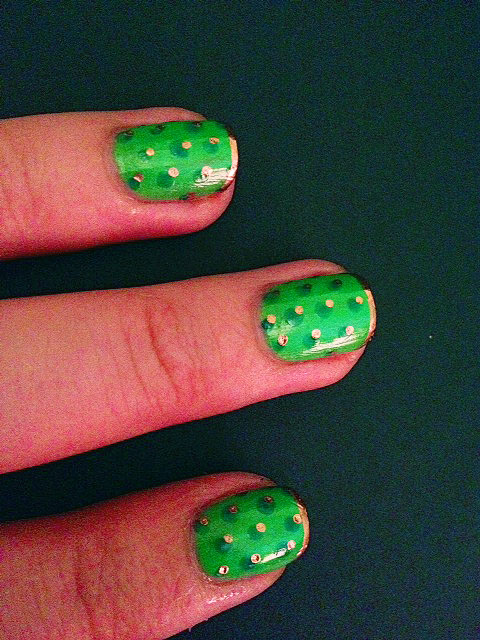
    This afternoon I was painting my fingers just a plain neon green when my boyfriend came home from work with a bronze metallic Sharpie in his hand. I haven't a clue as to why he had this Sharpie with him but when he saw I was painting my nails he decided to draw on one that I hadn't done yet. Hmm, using a fine tip permanent marker to draw on my fingernails? This could be interesting.


    I ended up just messing around with dots for fun, but the sky is the limit. I've always had trouble making designs on my nails with a nail polish brush, but small details became so much more achievable with a fine tip, plus sharpies come in almost every color these days so I might get more adventurous next time. The steps I took to make this design was as follows:
1. Base coat of neon green
2. Blue dots made by dipping a pin head in a puddle of nail polish
3. Clear top coat to add a shine to the nail polish colors
4. Bronze dots made with a Sharpie, off center of the blue dots
5. Fine bronze tip drawn drawn carefully with Sharpie


    In case you decide to give this a whirl I would suggest doing a base coat of nail polish before using a Sharpie directly on your fingernail because it will smudge off pretty easily so the nail polish gives it something to stick to. Also, if you want to do a design with both nail polish and Sharpie and you want to put a top coat on your nail polish, then do it in this order: base coat > nail polish design > top coat > Sharpie design. Painting a clear coat over top of the Sharpie can sometimes smear your design and that would be sad.

    If you do give this a try I would love to see pictures of what you come up with because there is never too much nail art inspiration on the internet. And let me know what you think of my nails!

Comments/Criticisms welcome :)

Thursday, June 14, 2012

Accordion Addiction

    It's been a while since I posted anything but that doesn't mean I haven't been doing anything. In fact, quite a few things have happened around here lately. Between that last post and now I've gotten my own sewing machine(!), I've been trying to get serious about my Etsy shop, and I'm also starting to plan a trip to Canada for early July to visit my family and friends back home. So many things to be happy about :)


    Back in April I gave Napkitten's accordion wallet pattern my first try(check it out here), and wrote up a review of it(here). For that initial attempt I followed the pattern as closely as I could and it turned out great, Nikki and I both loved it! Since then I have made three more using the pattern but I've changed a few minor things.


    Behind the card slots there is a thin pocket that is the perfect depth for paper currency. This alteration came about accidentally when I folded the material for the card slots in the reverse order from the pattern(I think) and ended up with extra fabric at the top. I really like it for bills because it's slightly more secure than the accordion pockets. 


    Another thing I changed was the idea of the loop on the side to allow a wristlet strap to be attached. First off, I could not find little D-rings the right size no matter how hard I looked, so I just left them out. Fabric loops work just as well and they tuck into the accordion folds so nicely when they aren't in use that they are barely noticeable. I also put a loop on both sides of the wallet. This means the wristlet strap can be worn two ways or a continuous strap can be attached on both loops to turn the wallet into a little purse.


    I do a few more things my own way but they are just in the construction and are mainly to make things a little easier or a little quicker for me while sewing. I'm also getting closer to mastering the art of making my own bias tape! If you want to make your own bias tape for this wallet, I recommend using the tutorial on Coletterie.com but the square needs to be 11"x11" (I've tried 10", 15", and 12" so trust me) and the lines need to be 2" apart instead of 1".


    Thanks for looking, and all three of these wallets are available in my Etsy shop. I'd love to hear what you think and any suggestions for additional changes I could add in the future. So far I've been told to try adding a zipper pocket on the back exterior and to add something extra on the front such as a bow or fabric flower.

Comments/Criticisms welcome :)

Wednesday, May 16, 2012

Mom Don't Look!

*Stop reading now if you are my mother and have not yet received a package in the mail!*

    So this past weekend was Mother's Day and I decided I would try to make her something. Unfortunately, I just moved out of the house with the sewing machine I was using so I ended up doing the majority of this project by hand. I had to go have a little visit with the sewing machine when I realized it was Friday and time was running out. Plus, I was getting pretty burnt out on sewing by hand >.<


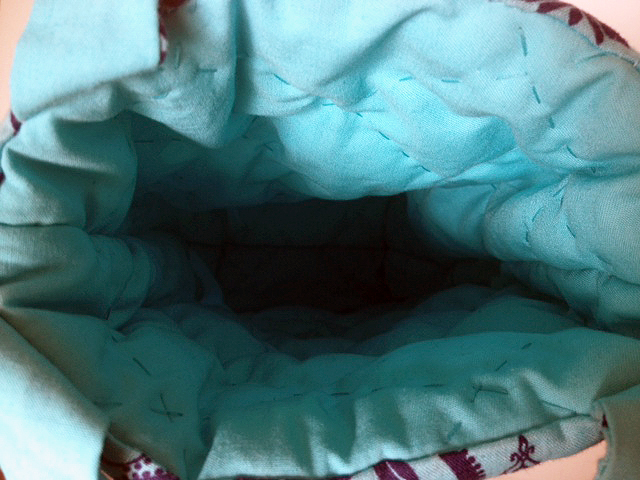
    This is a wine bottle tote. It measures 6" x 4" wide at the bottom, 7" wide at the top, and is 12" tall. It has two 1" wide straps that are each 12" long. It fits regular sized bottles easily, and those fat wine bottles snugly. It's fully lined and the interior has been hand quilted with some medium weight built batting so that it can get bumped around a little without worry. As usual, all my supplies came from Joann Fabrics. The exterior was 2 fat quarters, and the lining was left over from the lining of my Miche shell project


    I'm always looking for neat projects for my mom using wine corks or wine bottles, but I haven't come across any sewing projects for wine lovers. Hopefully she can get some use out of this when she is bringing a bottle of wine to a party or a friend's house or something. I thought about sending her a bottle of wine as well, but I'm guessing shipping that would have been slightly more difficult and I don't really have any experience picking good wines.


   And just for fun, here is a picture of the little Diablo skull usb holder my boyfriend got with his collector's edition of the game. The crystal in the middle of his forehead is a usb stick with the previous Diablo games on it. Isn't it cute? ^_^


Let me know what you think!

Comments/Criticisms welcome :)